Wednesday, November 2, 2016

BSA227, wrapping it up, 2 November, 2016

In addition to being our class project, Parth and I will enter this into the Southsure Emerging Artist Awards.  We're turning in our best efforts today but will have another go at it in a few days to refine our mistakes.  

12 ROTOSCOPED SEQUENCES.  OUTRAGEOUS!!!!!  
I will count how many frames that amounted to and update this blog later with Bold and underlined words.  I was able to figure out a way for Parth to help me with the rotoscoping:  he isolated the sequences in after effects, turned them black and white and them exported them into PSD files.  That saved me a few hours of cutting and sorting, which was much appreciated.  


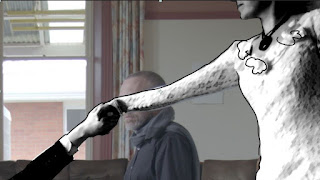
Harder than it looks and a terrible result.  It was deemed "acceptable" by Parth, which I'll take.  

This scene was going to be 375 frames long but I asked Parth to cut it down to 100 as there was no way I could finish the rotoscoping in time.  

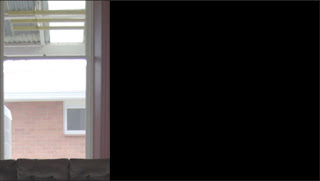
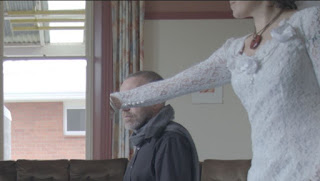
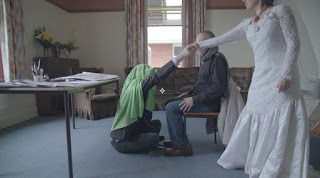
original shot: I thought that covering Josh's head in greenscreen fabric would help. Not so much.  The clean shot didn't match up, so the masking shot idea was scrapped last week. Instead, vaughn showed me how to size up the shot to naturally mask out Josh. 
 Except, in the last second of the shot, the green can be seen.  So I took 1/3 of the left of a shot early in the sequence where you can't see Josh and used it as a mask.  The rotoscoping was going over the top anyway, and it completely covered him.  I'm sure that there was a higher tech way of achieving that effect, but it was too late at night to figure it out.  Hooray for layers.  Because it worked.
"clean" png layer
on top of the action layer

and under the rotoscope layer
 I also need to brag on how I figured out how to match the original footage (which had to be resurrected to get the right shot length) and the segment Vaughn sized up for me.  I put both sequences into the same composition and copied the transform? details from the sized up to the original footage and voila, it was all the same size and matched the rotoscoping.  Because eyeballing it and playing with proportions wasn't cutting it.

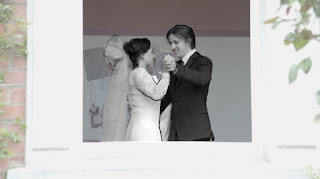
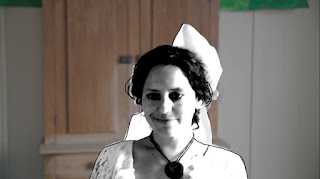
Next best special effect:  making Josh's long, curly hair look like a short haircut.  Not the most stylish by any means, but should pass by anyone who doesn't know Josh.


I thought that drawing in some of the loose hairs at the side of her face would look good, but I was wrong; it is unintentionally hilarious to have them wagging at all times during this shot.  I will fix this for our Southsure entry.


Monday, October 31, 2016

BSA215, final comic colouring, 31 October, 2016

Page 15:

Not so lucky last:  I had an hour of mouse painting at home and half an hour the next morning with the pen and tablet.  The words and bubbles are the next priority.  I got halfway finished before I had to turn the comic in.  I'm going to get a reduced grade for the assignment, but I should be able to get it bubbled in time to have it printed.

BSA228, Mood lighting, 1 November, 2016

Lulu and the talking topiary

quite by accident, there appears to be a second facial toiary in the garden.

Lulu considers which maze she's going to explore first
Lulu in the lavender maze


At the front door with the door knockers that she found in the mazes.


pre-set skybox.  rotating the directional light around changes the position of the sun in the sky
Super moody!  a little backlight at the back is great to throw the castle into relief.

Lady Greigh's talking topiary is looking ominous


Greigh Gardens with the addition of a free downloadable skybox from the Unity store that Rachel showed me how to manipulate.  A layer of blue over a cloudy sky darkened it up enough to pass for sunset.  Then I added a harvest moon into the right background plate

BSA228, splash screens, 31 October and 1 November, 2016

minimum requirements,
splash screen with start game and quit buttons
splash  screen should be separate from level one

in Unity, open new scene and save as start
drag and drop it so they're in exact order as game should be played in build settings
3 layers on every seen
U- user
UI-user interface
game
Game Object to UI to canvas, which is like a  photoshop file
UI components can be added directly into canvas through add component bar- anything in a website is available.
problems with going straight into canvas: ex: typing into text box means it won't move separately from the canvas, we can only rely on paragraph alignment tools.
instead,
game object- UI- text which makes the text it's own object and it can move independently from the canvas.  if the text gets bigger than it's box, it will disappear.  change box size in rect transform, which is where you can also move the text around in the game.
if you don't want ARial as the font, you need to put the font in the build.  go into photoshop and figure out what font you've used
create folder in assets for fonts
embed them in the game by saving them into the font folder
in C drive, under windows, go into fonts folder if you want to use fonts from your computer.
Can also download fonts from fonts.com
hit overflow if you don't care about box size.
buttons do care about overflow, so size up box instead of selecting overflow options
game object- button
automatically says button but that can be changed
button and text can be moved separately

remove white button after sorting out the layout by hitting alpha? bar under color in inspector
keep space between the buttons so game doesn't get confused

Bring in background picture by
create folder in assets called UI elements to bring in picture (without fonts)
save as PNG
in inspector, can choose sprite 2D and UI for more options
change image size from 100 by 100 to whatever the size was in Photoshop

Ipads are:
4:3
One of the selling points for the iPad is its use as an e-book reader, using Apple's iBooks software, and Jason Snell sees the iPad as a great device for displaying comics, saying, “the iPad's 1024-by-768-pixel display, while in the unfashionable 4:3aspect ratio, is just about the right shape for a comic-book page.”Feb 1, 2010
My game font is Century Gothic Bold in 72


1st November
Ipad aspect ratio isn't important at this stage, so I went back into photoshop and resized it to fit the canvas in Unity. Rachel showed me
BSA215, comic turn in, 31 October, 2016

Covered in Shame.  Half of my comic doesn't have bubbles or words.  I underestimated how long it would take to bubble and letter a double-size comic. When I go back to it, though, Rachel has kindly shown us how to make shape bubbles in photoshop with the shapes menu.  It will go in white and then I can click to the sideo f the layer to bring  up the effects menu and choose a 4 pixel black stroke to go around it.  huzzah.


half moon addlayer  and curbes layer at top of hierarchy

put it all into one photoshop file

drag out rulers to take two mil off edges
save each page as a jpg, save as page numbers (cover is page one, back cover is page 20)


open adobe acrobat, file, create, combine files into single pdf
drag and drop into box and reorder if necessary, then hit combine files to save as one big pdf.
title combined pdf with my name

to avoid pixellation in pdf, make everything a tiff and take them into indesign and take them out to PDF from there.

Saturday, October 29, 2016

BSA227, Rotoscoping in Photoshop, 29 October, 2016

Things are starting to pick up now that I'm working in PS.  I tried to rotoscope one last time in After Effects but decided that while it was significantly faster this time (probably due entirely to working with one small clip and not the whole movie), the only thing I need from AE now is to turn all the frames black and white in one step (colour correction menu) and then export the sequence to photoshop.  It's more helpful to see what the figures are like in their environment- it's easier to pick up lost bits when I can see them moving with the black and white figures.
 Above, you can see where I've cut out the background of the frame I'm working on and the figure has moved ahead slightly in the frame just below it. I will next change the image to black and white to catch any bits that didn't get caught in AE, then the dark strokes filter, and finally a little bit of line work for emphasis.


S24 movie on Vimeo