Showing posts with label BSA306. Show all posts
Monday, November 20, 2017
Tuesday, October 17, 2017
BSA306, Final presentation, 17 October, 2017
I forgot, AS ALWAYS, to add a card that lists the contents of the entire presentation. My classmates don't use spellcheck but manage to always remember to do this. Hmmmm. Does it all balance out in the end?
I discovered Print Experiment #5 (a card I failed to add along with the all important Photoshop fix explanation) that Makerbot prefers files with an .stl as opposed to .obj extension. Taking the file into Photoshop, running the fix, and then exporting at .stl solved the "holey" printing problems I was having.
I'm very happy with the results of my research and experiments. I'm really pleased to have so many good prints and they will be in my final exhibition. The assistance I got from Kevin, Chris, and Rachel helped me achieve a product of which I am proud.
Some questions that I got from the group:
Will I sculpt and print the other characters? Yes. I wanted to do all of them but there wasn't enough time to do that when I no longer needed 3D characters for my animation.
Will I ever do a big head Funko style of this character? Yes. I designed some "chibi" designs but decided to focus on keeping the character as it appears in the animation so anyone who gets it is clear on the design. Anybody that sees the Funko Batman knows that this is the FUNKO Batman and not Batman, full stop.
Would I ever pose the character, or would I leave it in "idle", or stationary, pose? Yes. I did experiment with putting in a quick rig but found that the weighting that would have been needed to get the pose right was going to be time-consuming and outside the bounds of requirements for my animation.
I discovered Print Experiment #5 (a card I failed to add along with the all important Photoshop fix explanation) that Makerbot prefers files with an .stl as opposed to .obj extension. Taking the file into Photoshop, running the fix, and then exporting at .stl solved the "holey" printing problems I was having.
I'm very happy with the results of my research and experiments. I'm really pleased to have so many good prints and they will be in my final exhibition. The assistance I got from Kevin, Chris, and Rachel helped me achieve a product of which I am proud.
Some questions that I got from the group:
Will I sculpt and print the other characters? Yes. I wanted to do all of them but there wasn't enough time to do that when I no longer needed 3D characters for my animation.
Will I ever do a big head Funko style of this character? Yes. I designed some "chibi" designs but decided to focus on keeping the character as it appears in the animation so anyone who gets it is clear on the design. Anybody that sees the Funko Batman knows that this is the FUNKO Batman and not Batman, full stop.
Would I ever pose the character, or would I leave it in "idle", or stationary, pose? Yes. I did experiment with putting in a quick rig but found that the weighting that would have been needed to get the pose right was going to be time-consuming and outside the bounds of requirements for my animation.
Thursday, October 12, 2017
BSA306, Human v. Horse, 11 October, 2017
https://www.facebook.com/nprskunkbear/videos/269419560129851/
I like these Skunk Bear people! Science plus animation equals win win win.
Wednesday, October 11, 2017
BSA306, The Animal That Wouldn't Die", 11 october, 2017
Skunk Bear's animation "The Animal That Wouldn't Die"
NPR posts animations all the time that are provocative, informative, cleverly done, and beautiful. This animation shows one scientist's investigation into the hydra. This production team knows how to make science fun and thrilling.
This frame is to remind me that you can still treat animation like a film and choose what's in focus and when.
Which of these people did the animation? And why don't they CALL it animation?
NPR posts animations all the time that are provocative, informative, cleverly done, and beautiful. This animation shows one scientist's investigation into the hydra. This production team knows how to make science fun and thrilling.
There's this really cool chalkboard animation. The lines look like chalk, they're erased by an invisible duster like a chalkboard would be erased, and you can see the ghost of past drawings hovering behind the hydra diagram.
This frame is to remind me that you can still treat animation like a film and choose what's in focus and when.
Which of these people did the animation? And why don't they CALL it animation?
Wednesday, October 4, 2017
BSA306, Tom Petty and animation, 4 October, 2017
Tom Petty died this week. There have been tributes to him all over the news and the internet. This one from nofilmschool.com looks at his videos.
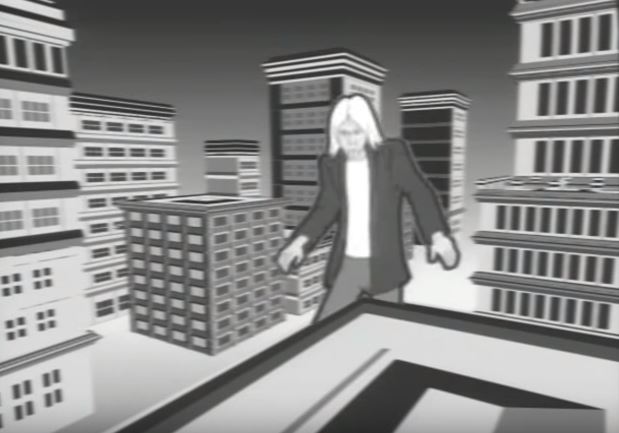
Runnin' Down a Dream is referencing Little Nemo in Slumberland by Winsor McCay. Thank you, film and animation history classes! I like the greyscale palette and thick lines around the main part of the action. Directed by Jim Lenahan with animation by someone who doesn't seem to be credited anywhere on the internet. What's up with that?
This appears to be early 3D animation combined with 2D. Great song, great video. One of many.
Runnin' Down a Dream is referencing Little Nemo in Slumberland by Winsor McCay. Thank you, film and animation history classes! I like the greyscale palette and thick lines around the main part of the action. Directed by Jim Lenahan with animation by someone who doesn't seem to be credited anywhere on the internet. What's up with that?
This appears to be early 3D animation combined with 2D. Great song, great video. One of many.
Monday, October 2, 2017
BSA306, good 3D prints! 2 October, 2017
I need two more 95.50 jellybeans, then I'll have 3 different styles of packaging and collectibles,
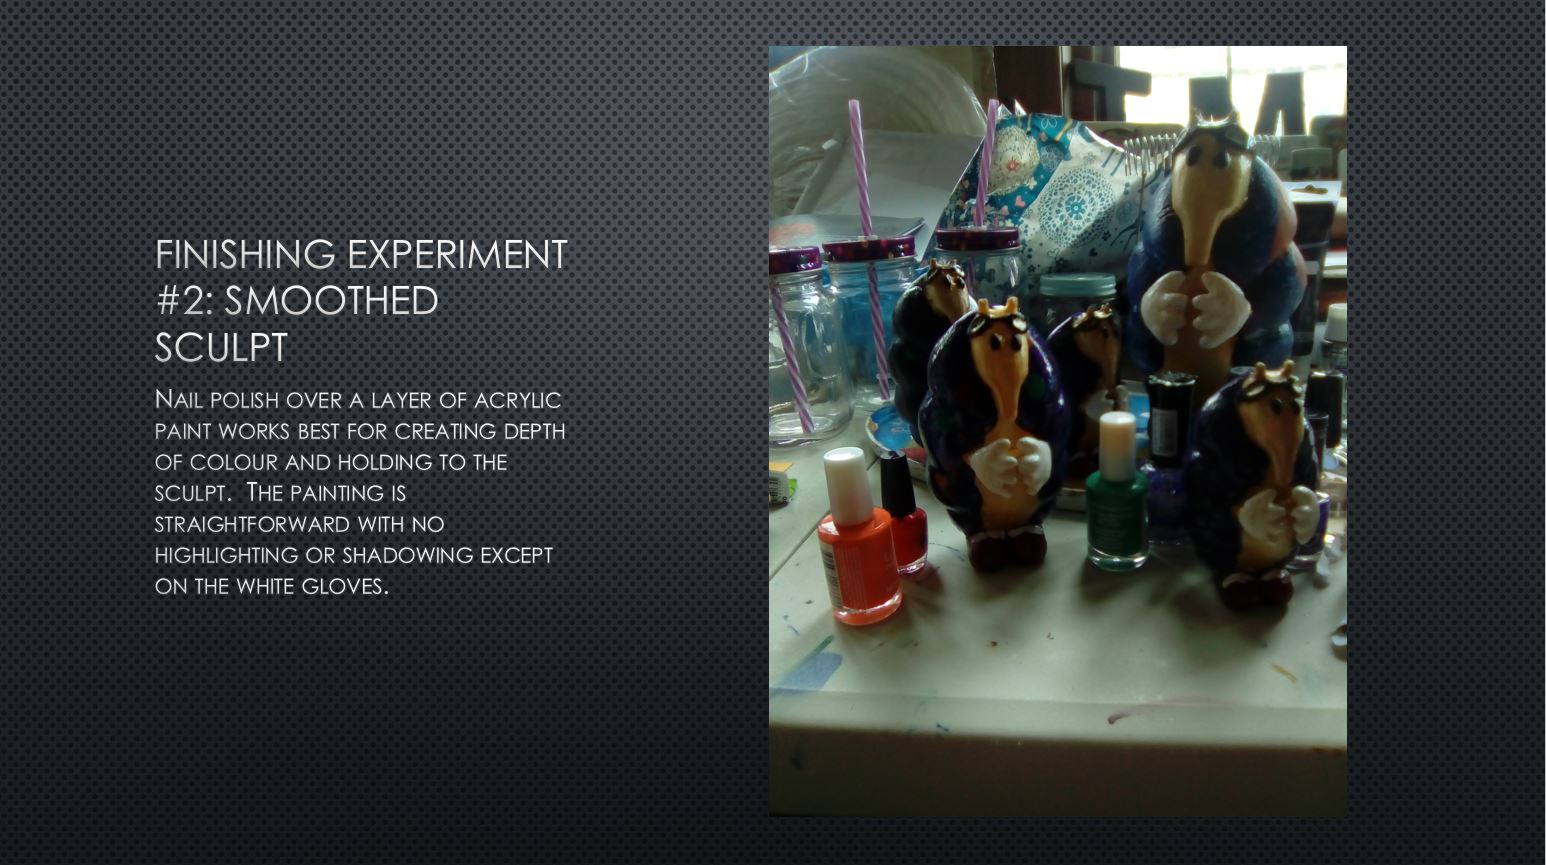
2 more 55.50 teenybeans for I don't know what, and 2 more gigantor Jellybeans to decorate and cover with fur. I've been painting the ones I've got this weekend and they're looking good. The nail varnish stinks forever and a day, though. Not sure how that's going to go with the candy jellybeans.
I ran out of white and changed out the filament to black. I'll need to prime it so the paint colours look like the other ones.
2 more 55.50 teenybeans for I don't know what, and 2 more gigantor Jellybeans to decorate and cover with fur. I've been painting the ones I've got this weekend and they're looking good. The nail varnish stinks forever and a day, though. Not sure how that's going to go with the candy jellybeans.
I ran out of white and changed out the filament to black. I'll need to prime it so the paint colours look like the other ones.
Wednesday, September 27, 2017
BSA306, Teenybeans, 27-28 September, 2017
After starting on my presentation, I was able to see what I've done and what still needs to be done for the 3D printing project. Some of my ambitions, like multiple characters, have been curtailed while I've been able to try different sizes and decorating styles of Jellybean. Printing without holes is my next goal. In pursuit of that, I have printed a "teenybean", 50mm high of Jellybean in the first position (hands outstretched). Very successful! No holes anywhere. Before printing, Rachel had a look at the model in Maya and photoshop and all was well. Or photoshop fixed something.
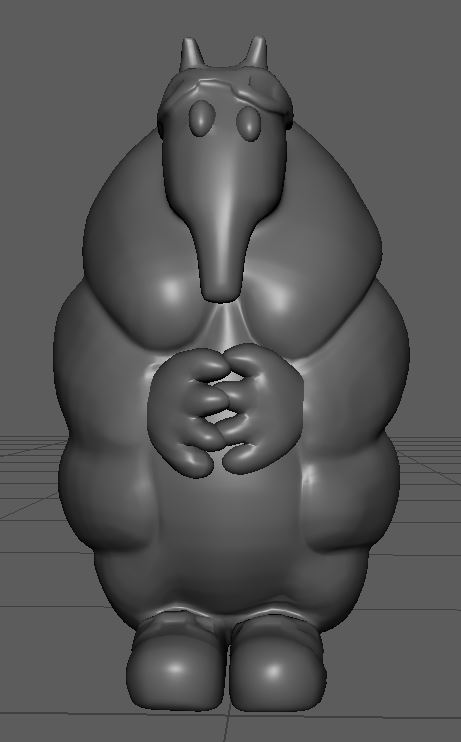
Not sure how that's worked out. Since that model was working well, I went into print2 model and took off the hands, filled the hole, fixed the geometry and imported an print1 to steal the hands. I positioned them on the belly with fingers more closely together and Rachel ran it through all of the mesh display checks ( average, conform, reverse, set to face, vertex to normal, soften edges) then exported as an obj and an stl.
Lookin' weird... this time in photoshop, the texture is all pixely and we don't know why. I took it to the makerbot software to see what would happen. I opened the obj and found lots and LOTS of holes, some I've never seen before in that program. I then opened the stl file and found no holes. Maybe the problem has always been that I've been printing objs and not stls.
YIKES. No. Photoshop really "fixed" this one and it looks like a blob of guano. I won't be exporting this. All of the detail has disappeared!
That's better. I looked back through the history and saw that Rachel had gone into 3D print settings. I put the settings to high and more detail has come back. I have exported that with repairs from photoshop as jbn_tst3.stl. After Teenybean2 finishes printing, I will print this one to compare differences. The print time is about 38 minutes so running multiple tests is easy.
Teenybean2 took 1 hour 37 minutes to print, is not the same height (even though I could swear I scaled it up to 50 mm, and has a thicker shell in some areas than others. I don't get it.
Teenybean 3 took 1 hour 51 minutes to print. WHY? And why is yet another sculpt that has been scaled up to 50mm a different size altogether from the first two? And the details on the hands have disappeared. Most perplexing. Thank God for these tiny tests.
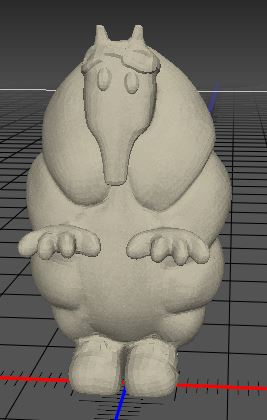
These are screenshots of one test 4 in the makerbot software. It's helping me previsualise what the print is going to be now that I know it's showing me problems in the sculpt. I've bagged printing number 4 until I can ask Rachel why geometry is being added (between the shoes and goggles) or smoothed off (eyes and fingers). I'm doing another test print, this time of #2 and have scaled it up to 95.7mm. Between 9 and 10cm will fit into the jar downstairs. Everything looks good according to the previs, very crisp.
I stopped the print at 47% because the crotch didn't print. I started it again with 2 shells, hope that helps.
28th
The 2nd go at the larger print was successful in the crotch but the ears were terrible! That was a 6 hour 43 minute print. What gives. Rachel had a look over the file again and ran it through photoshop where it's looking good. Everything also looks crisp on Makerbot. Printing it again to join the teenybean army that's developing on the shelf next to my computer. At 90% done, I can see little holes in the sides. It may be that 2 shells has to be the permanent setting, not 1. And the speed isn't that much better by setting it at 1. Will see about those ears. As Rachel said, I may have to make ears to put onto the sculpt. I can do that with Sculpy.
Teenybean #4 has some holes that can be filled, probably just by the nail polish, and the ears look good. Printing on high quality with 2 shells as Kevin and Rachel recommend will also fix that error.
95mm print: somebody logged me off the computer and the print stopped mid-way. Sigh. The holes are gone, so the 2 shell and larger print is definitely working. I've got two Jellybean "butts" on the shelf. Turn them into egg cups? I don't know.
Success! The 95.50mm Jellybean with 2 shells on 0.10 wall height? has come out brilliantly: crotch, ears, and hands are all there and it only took 3 hours 42 minutes to do it. I've put another one on tonight.
Tuesday, September 26, 2017
BSA306, more photos of finished collectibles and packaging, 26 September, 2017
![]() |
| Very inspiring rows of mason jars at Look Sharp in Auckland. |
![]() |
| Printing upright means no nasty rafts to sand off the back. Elsewhere, yes, so it's not without problems. |
![]() |
| Printing on the back of a seated Jellybean. This Jellybean won't sit without falling over so the sculpt needs flattening or it needs a stand to sit in. Fail. |
Little video of the whole presentation, including full run of the animatic.
Friday, September 15, 2017
BSA306, Makyu FormBox!!!! 15 September,2017
FormBox demo video
IT'S A TABLETOP VACUUFORM MACHINE! I CAN'T BELIEVE IT!
So vacuuform is how we made a lot of our armour when I worked at Utah Shakespearean Festival. This one relies on a vacuum cleaner to get the suction going through the bottom layer (you can see the tiny holes in the bottom plate where the air gets sucked through). The middle tray holds the plastic which is then warmed up with, I'm assuming, a series of lightbulbs in the top section. The plastic in the tray then gets dropped over the sculpt that sits on the suck tray (technical term) and forms a reverse mold. The makers then reckon you can pour concrete or another substance into the mold and go into business. I'm looking at this and I'm seeing all the findings, jewelry, and other assorted costumes props you can make out of it. How much is this beautiful thing, and should I wait to really want one until after they work out the bugs?
IT'S ONLY $US459!! I'll bet my mom would buy this for me if I promised to move home. lol
They're also saying you can 3D print stuff and use it as the positive to make a mold with. I could really have an army of Jellybeans going. Ha ha!
IT'S A TABLETOP VACUUFORM MACHINE! I CAN'T BELIEVE IT!
So vacuuform is how we made a lot of our armour when I worked at Utah Shakespearean Festival. This one relies on a vacuum cleaner to get the suction going through the bottom layer (you can see the tiny holes in the bottom plate where the air gets sucked through). The middle tray holds the plastic which is then warmed up with, I'm assuming, a series of lightbulbs in the top section. The plastic in the tray then gets dropped over the sculpt that sits on the suck tray (technical term) and forms a reverse mold. The makers then reckon you can pour concrete or another substance into the mold and go into business. I'm looking at this and I'm seeing all the findings, jewelry, and other assorted costumes props you can make out of it. How much is this beautiful thing, and should I wait to really want one until after they work out the bugs?
IT'S ONLY $US459!! I'll bet my mom would buy this for me if I promised to move home. lol
They're also saying you can 3D print stuff and use it as the positive to make a mold with. I could really have an army of Jellybeans going. Ha ha!
Thursday, September 14, 2017
BSA306, prototype packaging design, 14 September
The group, except for Jellybean who is in the jar, wrapping around the outside facing into the jar to look like Jellybean is with friends. Maybe it'll look more impressive in colour because b/w isn't doing anything for me.
I did the research, but didn't spend any real time designing what I wanted the packaging to look like. It's definitely "prototype" for this exhibition. The middle name band looks very nice wrapped over the brown box. I think I would extend the band so it wrapped all the way around the box and "sealed" it. Each character, if I was doing the whole line, would have their face in the circle. Medium Jellybean went into the box with a hunk of purple fur. It was to keep the toy from rocking around in the box. In reality, shredded paper would be the better, more cost effective option.

The jar packaging, at extreme left in this photo, has a plain name band on the front, a product description sticker on the back and a group portrait of the group stuck on the inside of the jar for colour. The description sticker is really big and I don't think you can see the portrait. combined with the name badge, it does look like a unified wrap and would look very flash if I could get the size right and print it in one piece. I'll do some more work on these ideas for the final project talk. I still need to get good prints going before I do anything more on packaging. If the toy is crap, who cares what the container looks like?
Subscribe to:
Posts (Atom)